What Was Meant to be Figs, Turned to Melons

I was real lazy with this recipe, but I mean it’s not a difficult recipe. Then again, shouldn’t that make me want to put a little extra effort because of that? Then again, I live in Los Angeles and there’s a reason rich people have what they call chore whores. Stepping outside to go anywhere in Los Angeles requires an effort. I live .9 miles away from my nearest grocery store. Depending on the time of day, that can take me 15 minutes to get to. No joke. Some days I just don’t even want to test it.

So here’s the deal with this recipe that comes from The Italian Mama’s Kitchen, it calls for figs and prosciutto. My Von’s does not sell figs. I could have driven down to a Gelson’s or a Whole Foods where they possible might sell figs, possibly. Side note here, I loathe Whole Foods. Why? It’s a bit the hipster in me but also the fact that it is so expensive and I feel like they are exploiting people who want to eat healthy. Exploitation pisses me off, especially when money is involved.

Gelson’s is also a little pricey, but I’d rather go there than Whole Foods. I decided not to, because it’s on the other side of my neighborhood. I make the trek there often to go to Trader Joe’s which is across the street from the Gelson’s, but even going to Trader Joe’s is a pain. There’s no direct easy route there and depending on the time of day you have to wait until a parking spot is open; which could be worse, but thankfully there’s a parking attendant to monitor all the parking traffic. Once you get through all of that mess, you’ll think you are safe and content, but then you open the door to the store and everyone is running amok and blocking aisles.  I often feel like I’m in some strange obstacle course or somehow got sucked into an intense game of supermarket sweep.

It’s a struggle, it’s a battle, and there can be only one

Anyway, this is a long explanation of why I decided to buy citrus melon instead. To be fair to myself, the recipe said you should try this with citrus melon as well. Also a friend of mine actually found and did a similar recipe for his Superbowl party. So I already knew it was delicious.

Yes it was, is, and will always be delicious. It’s also not hard to do. You cut the melon and wrap prosciutto around it. That’s all ya gotta do. I would have loved to have tried this with figs and maybe someday I will, but for now citrus melon is a top-notch replacement.

IMG_1068

Poorly Wrapped Prosciutto on Melon (2015) Von’s, Santoku knife, Melon, Prosciutto (1/4 sliced)

A Chex Mix Fit for an Admiral

This Chex mix comes from Light and Healthy which is a cookbook I love, but I am getting tired of making Chex mixes. Thankfully this is the last one. The next recipe will be hummus, which I am excited about.

What you need for this mix is 5 cups of Corn or Rice Chex cereal, 2 cups of oyster crackers, 1 cup each of Pepperidge Farm Cheddar and Pretzel Goldfish, 1 cup of broken Melba toast, 2 tablespoons of butter, 2 tablespoons of canola oil, 2 tablespoons of hot sauce, 1 tablespoon of lemon juice, 1 tablespoon of Old Bay Seasoning.

With all these Chex mixes, the first step is to pre-heat your oven to 250 degrees and the next is to combine all of your crackers, Chex, and etc. into a large bowl. For this recipe you mix the listed ingredients until you get to the butter. From the butter on, are ingredients for the sauce you will pour on your mix later.

For my mix, I really mixed it by using both Corn and Rice Chex, which turned out well. I should also note that like I wrote in my last mix entry, I had trouble finding Melba toast, so I substituted with Brioche toast from Trader Joes again. Other than that, this portion of the recipe went as listed and planned.

Making the sauce for these mixes is always my favorite part. I get a real kick out of watching butter melt. I’m not entirely sure why. It just amuses me.

So as you can guess you are going to melt your butter with the oil, lemon juice, hot sauce, and seasoning over medium-low heat. There isn’t a whole lot of cooking time with this, you just cook until the butter has completely melted and then you drizzle and mix with your mix.

I did have one problem with the sauce portion though. I could not find Old Bay seasoning. Thankfully there are solutions for this. You can either make your own or substitute with Emril’s Essence. There are some great recipes out there for Old Bay Seasoning and it doesn’t look difficult, but I’m not exactly rolling in the dough and that mix requires a lot of spice shopping. So I decided to go for Emril’s Essence, which turned out to be a more than suitable replacement.

Other than that, the rest of the recipe is the same deal as with the other mixes which is baking in the oven for 45 minutes with shuffle breaks every 15 minutes.

This turned out well, but I thought the Barbecue Chex Mix was better. Like always, I brought this to my acting class. I do have a plot twist about that though! I got moved to the advanced level at my school so I had new people to inflict my mixes upon. They seemed to enjoy it like my class before did. I look forward to continually bribing them with food in the future.

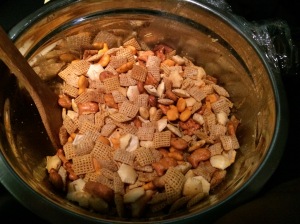
IMG_1061

Fishy fish mix

Eggplant Rolls

This recipe comes from Classic Pasta at Home and is fairly simple to make. It’s a bit time consuming though, not so much in physical labor, but in waiting time. The eggplant cooking process is kind of like cooking with a crockpot, so to speak.

What you need for this recipe is 2 eggplants, 2 red bell peppers, 1/4 cup of fresh bread crumbs, 3/4 cup of grated pecorino cheese, one tablespoon of pine nuts, 4 tablespoons of olive oil, 2 cloves of garlic, basil leaves, white wine vinegar, and parsley.

Your first step in making this dish is to trim and cut the eggplant into 1/3 inch slices. You are only going to use 8 of these slices, however. Once you’ve got your 8 slices, arrange them on a rack and sprinkle with salt. Let them stand on the rack for about two hours. This is done so the eggplant softens, making it easy to roll up.

When the eggplant has soaked enough salt, you pat it dry and then boil it in water for 5 minutes to soften even further. After the boiling process you transfer the eggplant strips onto a towel to dry.

Now you are ready to make your filling. I got a bit annoyed with myself on this process. I almost always refer to the recipe list for my measurements, forgetting that those measurements are sometimes divided into different sections of the cooking process. Needless to say when a recipe says “throw all the stuff together!” I take it for it’s word and then just look to the ingredients list instead of paying attention to the details within the recipe.

I never said I was a good cook people. Read my intro, I admit fully I lack in culinary skill.

Anyway the first step in making the mixture I got through unscathed. That was to set the oven to the broiler setting, though. So do that and then cut your bell peppers in half. Remove the seeds and place inside the oven. Broil until the skin has blackened and then peel once they have cooled down. After they are peeled, cut the peppers finely and mix with one tablespoon of olive oil, not four like I did. You will also add pine nuts, (which I omitted because although they are delicious, they are also expensive) breadcrumbs, and 1/4 a cup of the cheese. Guess what I did with the cheese? Added too much like the oil. Thankfully my mixture turned out ok, despite this error.

The garlic is also added to your mixture, but after it’s been sautéed in olive oil for a minute. This should be done with one tablespoon of oil and the garlic should be minced before cooking.

When you finally mix everything together, all you need to do is spread the filling onto your eggplant strips, add a strip of basil, and roll up. Drizzle the eggplant with the remaining olive oil, which should be two tablespoons by the way and sprinkle with white wine vinegar.

Your rolls are now ready for baking. To do so, set the oven to 375 and bake for about an hour. Remove from the oven, sprinkle more cheese, touch it up with some parsley, and you’ve got a tasty little eggplant roll!

My rolls came out a little over cooked and stuck to the bottom of pan, but they tasted amazing! I recommend cooking them for a half hour instead to prevent this problem. I think the full hour is not needed. I haven’t tested this theory, though, so feel free to check for yourself.

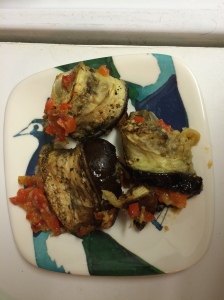
IMG_1057

Overstuffed eggplant rolls

Sassy and Spicy Marinated Olives

This recipe comes from I Love Spice and is another easy and simple recipe to make.

It’s not very labor intensive and most of it is smashing all the ingredients into a mason jar and letting it marinate for a week or two. For this recipe, I had to use two mason jars, so I do recommend reducing the ingredients in half.

The ingredients you’ll need are four garlic cloves, a lemon, 2 tsp of crushed coriander, 1 pound of large green olives, 4 fresh thyme sprigs, 4 fennel stalks, 2 small red chilies, and olive oil.

As far as labor goes, all you do is crush the garlic cloves with the flat side of a knife, cut the lemon into small chunks, and dice the chilies. For the chilies, I used jalapenos, but feel free to use whatever spice you like.

I have to make a note that the fennel I bought was pricey so make sure you have a use for your fennel beyond this recipe too. I plan on stir-frying mine with some eggplant. Stir-frying is one of the best way to use up old ingredients I have to say.

The only other step in making this is to add olive oil until your olives are covered. It has been a week since I made this and I did try them today. The olive oil got a little thick looking, but don’t let that scare you. It still tastes delicious. Re-reading the recipe book for my post made me realize I was supposed to let it get to room temperature before draining the oil and such, but I mean it was fine. I’m guessing that might help with the texture and look of the oil.

Overall I thought this was a good recipe and even though it doesn’t take a whole lot of time to make, I don’t know if it’s worth making again. The price of the fennel is what sways my opinion. Plus, there are olive bars all over nowadays so I feel like you could just buy olives like this for a fair price and then you don’t have to worry about using up your fennel.

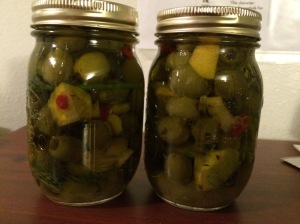
IMG_1047

Locked up olives

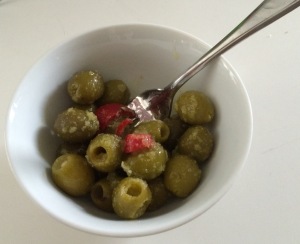
FullSizeRender

Emancipated olives

Herbal Potato Salad with Squash and Trash Pickles

This potato salad comes from Cooking Light. I don’t know what else to say about that and have no good segue, so let us move on to the next paragraph.

I wanted to like this potato salad. I like potatoes and I like squash but gherkin pickles ruined it for me. Gherkin pickles are in my opinion, the trash version of pickles and are gross. Other people probably like them and I say good for them, but this girl right here thinks they are trash.

The good news is that if you think they are trash like I do, you can substitute with capers. So keep that in mind.

If you want to discover whether or not you think gherkin pickles are trashy, the first step is to boil your  2 pounds worth of baby red potatoes. Once boiled, you allow the potatoes to simmer for 18 minutes. Once tender, you drain, cut into quarters and set aside.

Your next step is to grill a yellow squash. I do not have a grill, so I just placed my squash on my oven rack, with foil protection, of course. You want to set your heat to a medium high setting. For my oven I think I put it on 350. Before you do that though you want to cut your squash into 1/2 inch slices, spray lightly with cooking oil, and sprinkle with pepper and salt.

You will grill each side until they are browned and tender. Once that is done, you will mix them with the potatoes.

The next step is to make your trashy dressing which consists of 1/3 a cup of chopped fresh chives, 3 tablespoons of parsley, 2 tablespoons of basil, 1 tablespoon of tarragon, 1/4 teaspoon of grated lemon rind, 3 tablespoons of lemon juice, 2 tablespoons of water, 2 tablespoons of olive oil, 2 tablespoons of chopped trash pickles, and salt and pepper. Throw all these things into a bowl and whisk. Pour that over your potatoes and squash and toss lightly.

Like I said, I was not a fan of this dish. Trash pickles give it a strange sweet flavor that I was just not a fan of. The spices used for the dressing were tasty though and I’d bet I would have liked this if I had left out the pickles.

IMG_1042

Potato, Squash, and Trash

The French Way to Eat a Radish

This is less of a recipe and more of a suggestion. It comes from The French Farmhouse Cookbook. The author of this cookbook calls this the best little springtime snack. I was skeptical. I mean, come on, we are talking about radishes as snacks people.

Well, the French have opened my eyes. I found myself enjoying radishes in a way I never thought possible. Don’t get me wrong, if I was able to eat whatever I wanted and not get fat or sick, I would pick chili cheese fries over radishes. However, if you are a former fat kid that is trying to stay a former fat kid, this is the way to go.

If you are wondering, yes I was a former fat kid and I’m still not model thin or anything, but I’ve come a long way.

So how to eat radishes, French style, is as follows. Get a small bowl and put some sea salt in it. Grab a slice of sourdough or french bread baguette style. Butter the slice with butter, naturally. Dip your radish in salt, take a bite of that, and then a bite of your bread. I told my mother about this dish and her response was, “Oh it’s like a tequila shot!”

Way to be an alcoholic mom, but yes it’s like a tequila shot only without the ensuing embarrassment that comes after, like singing songs in the back of vehicles because you’ve had too much, dancing on bar tabletops, and/or making some poor life choices that you wish you could take back.

Radishes won’t do that to you. They are nice, well-mannered, little things. They make good boyfriends. I need to find a radish boyfriend. Sad face, sad face, everyone.

IMG_1031

Salt, radish, bread

Salsa Verde Italian Style

This next recipe comes from my hometown cookbook, The Little Italy Festival Town Cookbook. It’s basically a tapenade sauce and comes from Josephine Mooney. I do not know this woman either. Sadly I don’t know any of the cooks in this book. They are from a generation I always wanted to meet but was before my time. I do know a Mooney from my town though and I wouldn’t be surprised if this was her relative.

I have to ask my mother next time I write about a recipe from this cookbook. I’m sure she knows some of these women and probably has a good story to go with it.

Anyway, like I said this sauce is more like a tapenade than a sauce. If you don’t know what tapenade is, it’s a french dish of olives, olive oil, capers, and some sort of fish (generally tuna or anchovies) that is puréed. I couldn’t help but think of the old SNL bass-0-matic skit just now. Thankfully bass and bass-0-matics are not needed in either of these dishes. I don’t even want to think about how gross that would be.

What you do need to make this salsa is 5 hard cooked egg yolks, 1 2-oz. can of anchovies with oil, 1 1/2 cup of finely chopped parsley, a clove of garlic, pepper, and oil and vinegar to taste.

The first step is to boil your eggs. Once boiled you remove the outer shell. Only the yolk is needed for this dish. The yolk and anchovies are then mashed together into a paste, which is not as easy as it sounds. If you have a mortar and pestal I would recommend using that. If you don’t have that, than maybe you should use a bass-o-matic.

After everything has been mashed, you add the rest of the ingredients until you get a nice smooth consistency.

I wasn’t sure what kind of consistency was needed for this dish admittedly. Mine turned out fairly dry and my instincts told me to add more oil, but I ended up not. The end result was ok. I’m not a fan of anchovies. I almost substituted with tuna even, but I wanted to give it a shot. I’ve had anchovy based sauces before where you couldn’t even taste the fish and I do wonder if I had added more olive oil, if that would have negated the fish taste. The anchovy taste in this dish was very slight despite that. For me though, it was there enough.

I’m not saying it tasted bad. I  just really don’t like anchovies. If I ever make this again, I’ll probably substitute with tuna.

The recipe in the book says to pair this sauce with steak, boiled meat, or chicken. I paired mine with a baked chicken breast that I marinated with parsley, garlic, basil, and oregano. It went pretty well together I have to say, despite the anchovies. Yuck.

IMG_1026

It kind of looks like spinach doesn’t it?

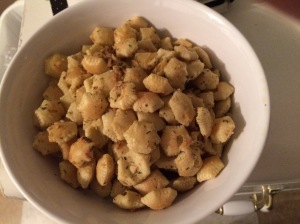
Seasoned Oyster Crackers

This recipe comes from Tastes of Monroe County and it reminds me a lot of the garlic and herb wheat thins you can buy at the grocery store. I think they are better even and probably healthier too.

The biggest struggle I had with this recipe was trying to find the oyster crackers at Von’s. It took me forever to find them. I almost gave up, but eventually found them on the bottom shelf near the saltine crackers. I was also a little perplexed by the recipe asking for salad oil. Salad oil is basically whatever oil you are cool with when making your own dressing. I had to google that to figure that out though. I used olive oil, but other alternatives are grape seed oil, vegetable oil, or whatever you like really.

Other than that, this is real easy and simple to make. It’s pretty much shake and bake without the little girl who helps and with crackers instead of chicken or whatever you shake and bake with.

Thanks for helping kid.

Anyway, you mix the oyster crackers, a cup of olive oil, one package of Hidden Valley Ranch dry salad dressing mix, a teaspoon of dill weed, and a bit of lemon pepper and garlic powder and spread on a cookie sheet. Make sure that the oil has absorbed as evenly as possible and bake in a 300 degree oven. After 15-20 minutes you will have a nice, crispy, and tasty snack.

Not much to this one, but those are sometimes the best recipes anyway.

IMG_1010 (1)

Oyster Crackers