Put a Pickle in It

What I wouldn’t do for a pickled cucumber. Actually there’s a lot I wouldn’t do and also why are cucumbers the only pickled item we just call pickles?

I’m not gonna turn into Bubba here and list all the things you can pickle, but if I were Bubba you can be sure there’d be a long montage about it just like in Forrest Gump.

So what gives?

What’s so special about cucumbers that they just get called pickles? Why did I not know this fact until I was an adult in my 30s? Was it a ruse to get children to eat cucumbers that went too far? Were cucumbers contraband back in B.C. times? So many questions.

All I know is that the cookbook Portlandia has taught me how easy it is to pickle anything and everything. Will I never look back now that I have this knowledge? I probably will because pickles are cheap and sometimes one gets lazy, but it’s still cool to know how to do it right?

What you’ll need

  • 1 1/2 pounds of Kirby cucumbers, ends scrubbed
  • 3 tablespoons of kosher salt
  • 2 tablespoons of sugar
  • 1 1/4 cups of distilled white vinegar
  • 2 tablespoons whole coriander seeds
  • 1 teaspoon of whole black peppercorns
  • 1 teaspoon of allspice berries
  • 2 cups of water
  • 4-6 chiles (variety is best) halved lengthwise
  • 6 large garlic cloves, halved

Pickling is so easy my friends and so is the first step of pickling which is to get two quart sized jars and evenly distribute your cucumbers.

Next get another quart sized jar and mix up the salt, sugar, vinegar, coriander seeds, peppercorns, and allspice berries.

Seal this jar up, pretend you’re the little girl from those Shake N Bake commercials back in the day and mix it all up until the sugar and salt dissolve.

Our next step is to add two cups of water to the mix and then pour our mixture into the jars with the cucumbers.

Next, slide in the garlic and peppers into each jar and then fill the jars with more water until everything is submerged.

Cover the jar and let it marinate overnight before consumption.

The sandwich is for scale

What a beautiful looking pickle am I right?

Good news is that it tastes just as good as it looks and it has a little kick too. As you can see by the photo I was eating these with sandwiches, but later I had a little barbecue soiree with friends and we are all putting these on our cheeseburgers. Everyone seemed to love them and I felt quite proud of myself.

Although I joked earlier about being lazy and still buying pickles in the future, at the same time I would encourage everyone to pickle their own pickles. It’s really easy and tasty. Plus it’s nice to know you have control of what you’re consuming.

I will most likely treat this like I do homemade salsa. I’ll make it when I’m up for it and buy when I’m not. it’s nice to have options and the knowledge to do things yourself isn’t it?

Fruit Summer Rolls

The authors of Portlandia aren’t sure if this recipe is a dessert or an appetizer.

I relate because I myself am in a confusing category. Am I Gen Xer or an old Millennial? Some surveys say Gen X and some say Millennial. I say I have one foot in each category and right now my Millennial foot is saying let’s not worry about labeling this dish one category over the other. Let’s combine two words and make it a thing! Its own category. Let’s call it a dessertizer!

We are the generation of avocado toast my friends. Our desire to combine and conquer is endless. All hail the Old Millennials.

What you’ll need for Dipping Sauce

  • 1/2 cup of passion fruit puree or juice
  • 2 tablespoons of freshly squeezed orange juice
  • 3 tablespoons of sugar
  • 1/2 teaspoon cornstarch dissolved in 1 tablespoon of water
  • 1 tablespoon of chopped fresh mint

What you’ll need for the rolls

  • 1 large ripe mango, halved peeled, and cut lengthwise into 1/3 inch thick slices
  • 1/4 large ripe pineapple, peeled, cored,  and cut into 8 (4 x 1/2 inch) spears
  • 1 large, firm, but ripe banana, peeled and halved lengthwise
  • Sugar, for sprinkling the fruit
  • 2 3/4 inch slices of pound cake (about 6 ounces)
  • 1 tablespoon unsalted butter, softened
  • 8 large (7-8 inch) round rice paper wrappers
  • 16 large fresh mint leaves
  • Chopped peanuts for garnish

Our first step in making this dessertizer is to prepare our dipping sauce. Do so by combining the passion fruit, orange juice, 3 tablespoons of sugar, and cornstarch in a saucepan. Whisk this up and then bring the mixture to a boil. Once boiling reduce the heat to a simmer until the mixture thickens.

Store this mixture in your fridge and allow it to chill overnight.

The next day, preheat a lightly oiled grill pan. While the pan is heating up, sprinkle the mango, pineapple and banana with sugar and butter up your poundcake.

By the way, I ended up making my own poundcake which thankfully wasn’t a complete disaster but wasn’t a fluffy as I would have liked either. Unless you are good at baking, just buy the poundcake.

We are now ready to grill our fruit. As I’ve mentioned before I do not have a grill, but you can set your oven to broil and get similar results. Broil or grill your fruit until lightly charred on each side. The bananas should take about a minute and the pineapple and mango 3-4.

Once fruit is ready, remove and then grill your pound cake until toasted.

We are now ready to make our rolls!

First step is to cut the banana half in half vertically as well as horizontally. We want to end up with 8 spears. Then cut the pound cake into 3/4 inch sticks.

Now get your rice paper out and a skillet with warm water. Dip the wrapper in the water to soften it, remove from skillet, blot dry and then let it sit for about 30 seconds. Fill the roll with two mint leaves on the lower third of the paper and then add a piece of pineapple, mango, banana, and pound cake. Roll this up tightly, tucking in the sides as you go. Repeat this process until all ingredients are used.

Once we are all wrapped, cut each roll in half and then arrange like so…

IMG_1839

I made this odd little dessert months ago, before all this pandemic nonsense. What I can remember is that it was odd. I wasn’t into it. The dipping sauce was great, but my tastebuds were just confused by the actual roll. It didn’t feel right to me.

I might have liked it better if I had done a better job with the pound cake. Maybe…

I might try this again, but not feeling too jazzed to do so. It is a unique recipe, I’ll give it that.


Portlandia Chicken Wings

Theme cookbooks from movies and/or shows are generally considered a novelty item, but I would encourage anyone who receive such gifts to actually take the time to cook from them. It’s entertaining and you’d be surprised how good most of the recipes are.

That has been the case for me when it comes to the Portlandia cookbook and I’ve had rewarding experiences with other themed cookbooks as well.  In the case of Portlandia, I have to say this is my favorite so far. So pay attention and try this one out!

What you’ll need.

For the wings

  • 2 tablespoons ground cumin
  • 1 1/2 teaspoons of crushed red pepper (feel free to add more if you’re a spice freak like me)
  • 1/2 teaspoon Chinese 5-spice powder (I used McCormick Asian powder myself if you can’t find Chinese 5-spice)
  • 2 teaspoons of salt
  • 1/4 cup all-purpose flour
  • 8 large chicken wings (about 3 pounds) split into wingettes and drumettes
  • 1 1/2 tablespoons of canola oil
  • sliced scallions, for garnish
  • fresh cilantro leaves, for garnish

For the duck sauce

  • 2 tablespoons of soy sauce
  • 1/2 cup of apricot preserves
  • 1 1/2 teaspoons of minced and peeled fresh ginger

Our first step is to pre-heat the oven to 425, so go ahead and do that. You just turn the knob on your oven to the number that says 425.

While the oven is pre-heating, in a large bowel combine cumin, red pepper flakes, powder, salt, and flour. Not much else to say here, just mix it around until everything looks even.

Next prepare a space where you can coat the chicken with the oil without causing a mess. Be sure to rub the oil evenly so that when we mix it with our spice mix it does the same. When the oil looks even, add the chicken to the spice mix and toss until every piece is coated evenly.

We are now ready to place the chicken on a baking sheet lined with parchment paper. Do so and brush lightly with more oil before placing in the center of the oven.

Once in the oven, allow to cook for about 50 minutes with one or two breaks to turn the meat over for even cooking.

Even is word of the day for this recipe as it is for most. Cooking is kinda socialist like that what can I say?

While the chicken is roasting, go ahead and make your duck sauce. To do so, combine all duck sauce ingredients in a food processor with a 1/4 cup of water. Blend until it’s smooth and then heat it up in a saucepan over low heat.

The goal is to reduce the sauce to about a 1/2 cup size. Once we reach that goal, you can remove from the heat and display the sauce however you wish.  I displayed by placing in a small white bowl as you can see below.

If your wings happen to be done by now, remove them from the oven, garnish with scallions and cilantro and serve with your duck sauce for dipping on the side.

If you enjoy that, of course. No pressure from me to actually eat them that way, but I like both garnished items myself and the dipping sauce is easy to make, delicious, and can be stored up to a month in your fridge.

fullsizeoutput_1bd

Look at this colorful, appetizing display of chicken wings! Trust me, it’s as good as it looks. I cannot recommend you try this recipe more.

You read the earlier passages, you can suss out how easy this is to make. It’s been Rachel tested and approved with the easy meal stamp.

If you do, I highly recommend you go all the way and make that duck sauce too. It’s so easy. This whole thing is easy. Don’t be lazy! You’ve got this.

If you don’t, though, I won’t judge. I follow the philosophy of the dude and the dude abides.

Strong Independent Popcorn Who Don’t Need No Microwave!

When I first came across this recipe from Portlandia, my eyebrow curled up. Really, a popcorn recipe?

Then I remembered that there are such things as cheddar and caramelized popcorn. I tend to be a movie theater popcorn purist. I don’t even like to butter mine. It gets too greasy and if the popcorn is done right from the get go with seasoning and etc, it’s not needed. In my opinion.

I’m a strong independent woman who don’t need no butter, but this recipe is of the nacho cheddar variety and let’s face it, I’m a cheesy person. Maybe it’s time I allow some cheese in my popcorn.

What you’ll need

  • 1/4 cup cheddar cheese powder or a packet of cheese from a mac and cheese mix (but then you don’t have cheese for your mac and cheese and that’s upsetting to me)
  • 1 tablespoon of nutritional yeast
  • 1 teaspoon of onion powder
  • 1/4 teaspoon of chipotle powder
  • 1/4 cup plus 2 tablespoons of vegetable oil
  • 2/3 cup of popping popcorn
  • 4 tablespoons of butter, melted
  • Salt

In an appropriately sized bowl, mix all your powders and the yeast.

Then in a large pot, heat the oil and then add the popcorn. Cover slightly with a lid and pop the corn over medium heat.

Once the kernels have popped pour the popcorn into a bowl and dump the melted butter on it. Toss until butter has coated evenly, then add half of your powder mixture and toss again. Once you’ve felt it’s been tossed enough, add the rest of the powder mixture and continue more tossing.

Eventually it all be mixed and then you can add salt to your liking and enjoy!

31nTHqWTTgOAF+rIqpuMzA

Brussels Sprouts and Bacon

When I was growing up, there were always TV shows were kids were like, “Ugh, Brussels sprouts! Why are you trying to kill me Mom?!”

I can’t recall if my mother ever made us Brussels sprouts, but I’m sure if she ever did I protested it. I’m sure I explained to her that t.v. had taught me that this was an evil green vegetable and was probably Jolly Green Giant’s mortal enemy.

f06a740a-bacc-45a3-83ff-4449b5bb9dad_1-8cc708f880cbfa8244065d0e59c93d2f

He’s probably just a double agent, right?

As I got older and more open, refining my taste for vegetables, I discovered that not only did I not hate Brussels sprouts, but that I freakin love them.

As I’ve stated in previous posts, this love of Brussels sprouts is not as passionate and as deep as my love for spice and cheese, but every once in awhile that green eyed beauty of a vegetable gives me a little wink and I can’t help myself. It’s an on and off again torrid affair, I’m telling you.

My first encounter with Brussels was when I was working at a pizza place that had seasonal menus and pizzas with toppings from local farmers. Every time we changed the menu, we had a special meeting where we would test out the food so we could give the proper recommendations to customers. That’s when I was introduced to Brussells sprouts and bacon pizza.

Yes, you read that right.

I know it sounds weird, but it was amazing.

We also had a side dish of Brussel sprouts sautéed in garlic with this slightly peppery ranch dressing that was to die for. Sometimes for my lunch meal, I’d get that and a side of meatballs.

Best perk working there was the food, let me tell ya.

If you reside in LA, that place is called Pitfire Pizza and you should definitely check it out.

Anyway, thanks to Pitfire, I developed a love for Brussels sprouts and this meal below, from Portlandia is similar to Pitfire’s Brussels sprouts and bacon pizza. It’s got bacon, Brussels sprouts, and it’s heavenly.

What you’ll need

  • 1/2 cup of hazelnuts
  • 1 pound of medium-sized Brussels sprouts, trimmed and halved
  • 3 tablespoons of olive oil
  • salt and pepper
  • 4 ounces of thick cut bacon, cut into 1/2 inch pieces
  • 1 large shallot, very thinly sliced
  • 2 tablespoons of sherry vinegar

The first step is my favorite step. Pre-heating the oven to 350. If it was 400, it’d be my second favorite step.

Next step is to spread the hazelnuts on a pan and toast them for about 12 minutes. You’ll know they’re ready when the shells are cracking a bit. Allow them to cool after the toasting and then rub them with a towel to peel off the shell skin completely. After this step, you will chop them into itty bitty bits.

Next, you will coat your sprouts with oil, and salt and pepper in a large bowl. Toss this mixture until they are evenly glazed.

Meanwhile, place a skillet on your stove top and set that sucker to some high heat. Once the skillet is hotter than a Texas summer, place the sprouts in the skillet with the cut side down. After about 5 minutes, the sprouts should be sufficiently browned and flipped over. Once flipped, cover and cook until they are crisp, yet tender. This should take about 3 minutes.

Remove the sprouts from the pan and replace with bacon. Scale back to a California summer heat setting (medium in case you don’t know) and cook for about 5 minutes.

The shallots are the next item to add to the pan. Cook those puppies while stirring for another 5 minutes.

We are now ready to tag back-in the Brussels sprouts. Toss and combine a couple of times and then add the vinegar. Cook the vinegar until it just about evaporates and then add the nuts and serve right away!

Or…..

You can add an egg, over easy or over medium, however you prefer on top. I did and I highly recommend it.

It’ll probably come to no surprise that I loved this recipe. As I mentioned, bacon and Brussels sprouts pair nicely together. They are both crisp and crunchy but in different ways that compliment each other.

The hazelnuts give it even more texture and add a bit of a salty taste which settles in nicely with the vinegar.

Then there’s the egg. You can’t go wrong with an egg in a skillet dish. At least for me anyway.

Since I’m plugging LA restaurants, I might as well add that this recipe is almost exactly like a breakfast item at The Brite Spot in Echo Park. It’s called the Brussels Sprouts and Bacon Hash and it is to die for!

The major difference is that this dish has potatoes. It’s basically a high end version of Denny’s breakfast skillets. I’m telling you, it’s a simple dish, but there is something they are doing that I can’t figure out and I need to, sorely.

For now, I am more than content with this recipe from Portlandia. 

How could anyone ever hate you Brussels sprouts?


Cheesy Beefees of Potency

Balls. Potency. The symbol of manhood. The patriarch’s second favorite shape, the other one being an eggplant emojii.

Was it a man who first thought to take a chunk of meat and form it into a ball for consumption? Was it a woman? A woman who wanted to show how she could take a man’s power from him. His pride and joy? Maybe it was just a psychopath who wanted to eat balls for real and was suppressing his or her desires by pretending with animal meat.

We will never know who decided to form meat into balls just like we will never know who invented the wheel. Another spherical shape of power.

Hahaha…..Rachel likes balls!!! – My friend’s kid Lana

I’m talking about meatballs Lana! You’re only six! What’s wrong with you?!

Serious talk everyone. This next recipe comes from Portlandia and is meatballs with cheese stuffed inside. Lana really did say that once, while I was at an Italian restaurant with her mom. She overheard me telling her mother about how some “men” I used to work with would tease me whenever I ordered meatballs for my lunch. They would say “Oh you want balls today? Do you like balls Rachel? Would you say that you love them”

It was dumb. Lana thought we were talking about actual meatballs and she was eating meatballs when she said that. It took everything in me to not say, “So do you kid. You got your mouth all up in them right now.”

I don’t remember what I ended up saying. I just remember my friend giving me this wide-eyed surprised look of slight embarrassment and then laughing.

If you love balls, especially meatballs, this is what you’ll need.

  • 2 slices of white bread, shredded
  • 2 tablespoons of half and half or milk
  • 1 large egg
  • 2 scallions, minced
  • 2 garlic cloves, minced
  • 1 large jalapeno, seeded and minced
  • 2 tablespoons of chopped fresh cilantro
  • 1 1/2 teaspoon of kosher salt
  • 3/4 pound of ground sirloin
  • 3/4 pound of ground chuck
  • Vegetable oil
  • 2 ounces of pepper jack cheese, cut into 24 1/2 inch cubes
  • 1/4 cup pus 2 tablespoons freshly grated Parmigiano-Reggiano

My favorite first step!! Pre-heat the oven!! Pre-heat it to 425 degrees and position rack on the upper shelf!

The next step is to combine the bread, half and half, and egg in a large bowl. Mix this into a paste texture then add the scallions, garlic, jalapeno, cilantro, and salt. Stir until well mixed.

Next add the meat and massage with your hands until it has melded with the rest of the ingredients. Once the meat has become one with everything, form that meat into balls. 24 to be exact.

When your balls are ready, prepare them for cooking by coating a pan with vegetable oil. Moisten your hands with a touch of oil and then gently tuck a cube of cheese inside each ball.

Now put your balls into the oven and cook until they are nice and firm. This should take around 12 minutes.

Once the 12 minutes are up, remove the balls from the oven and set the oven to broil.

Get another large bowl out and place a 1/4 of a cup of the grated cheese inside. Then put the balls in there and lightly toss them. Return the balls to the baking sheet, sprinkle the remaining grated cheese and then broil for 2-3 minutes. Be careful though, you don’t want to emasculate them. Balls need gentle handling and cooking.

Once the 2-3 minutes are up, after some cooling they will be ready for consumption.

You can serve them as an appetizer, with toothpicks on their own or dip them in tomato sauce. The best part about these balls is the cheese I have to say. They are your standard balls otherwise, but the cheese puts them ahead.

I can safely say that I do like these balls. I hope you do too. Just don’t tell Lana, she’s kind of a gossip.

IMG_1925


Crispy Pork Riblets Made from Cows

Do you guys remember in my last cooking entry where I mentioned that maybe my genius is I’m so manipulative that I manipulate myself? My genius sub-conscious has struck again!

Or maybe I’m just bad at taking notes/paying attention to detail.

It’s probably the latter, but you know what? Reality sucks. It blows. I kind of just want to be a delusional girl living in a material world. That’s what everyone else does and they seem happy.

Alas, I cannot delude myself for too long. I start out delusional about things and then my matrix plug gets taken out. I start out all happy and delusional, but then Morpheus comes along and is all like, “Hey Rachel, would you like to take this red pill?”

“Yeah! Hit me with some truth Morphman!”

“Are you sure? You could stay in this world where you think you made a recipe correctly or that the good you see in people actually does exist?”

Morpheus can’t even complete this warning to me, because as he’s talking I up and snatch that red pill like Violet does to Willy Wonka.

tumblr_mtjnuevv731s0teago6_r1_400

I don’t blow up or turn violet, but soon after I’m already wishing I stayed in the Matrix and continued to delude myself with fake steak like this guy.

tumblr_mrkvx6vvtz1rags46o1_500

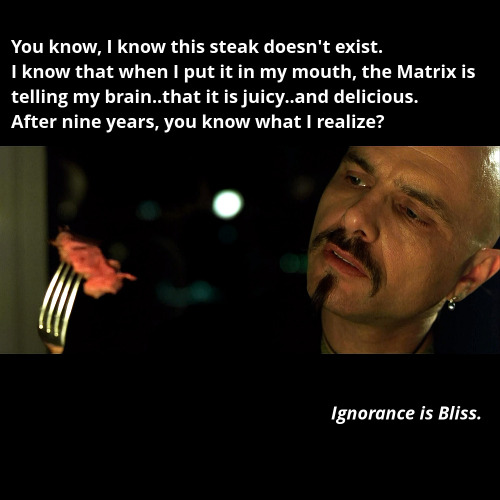
It wouldn’t have taken me that long even

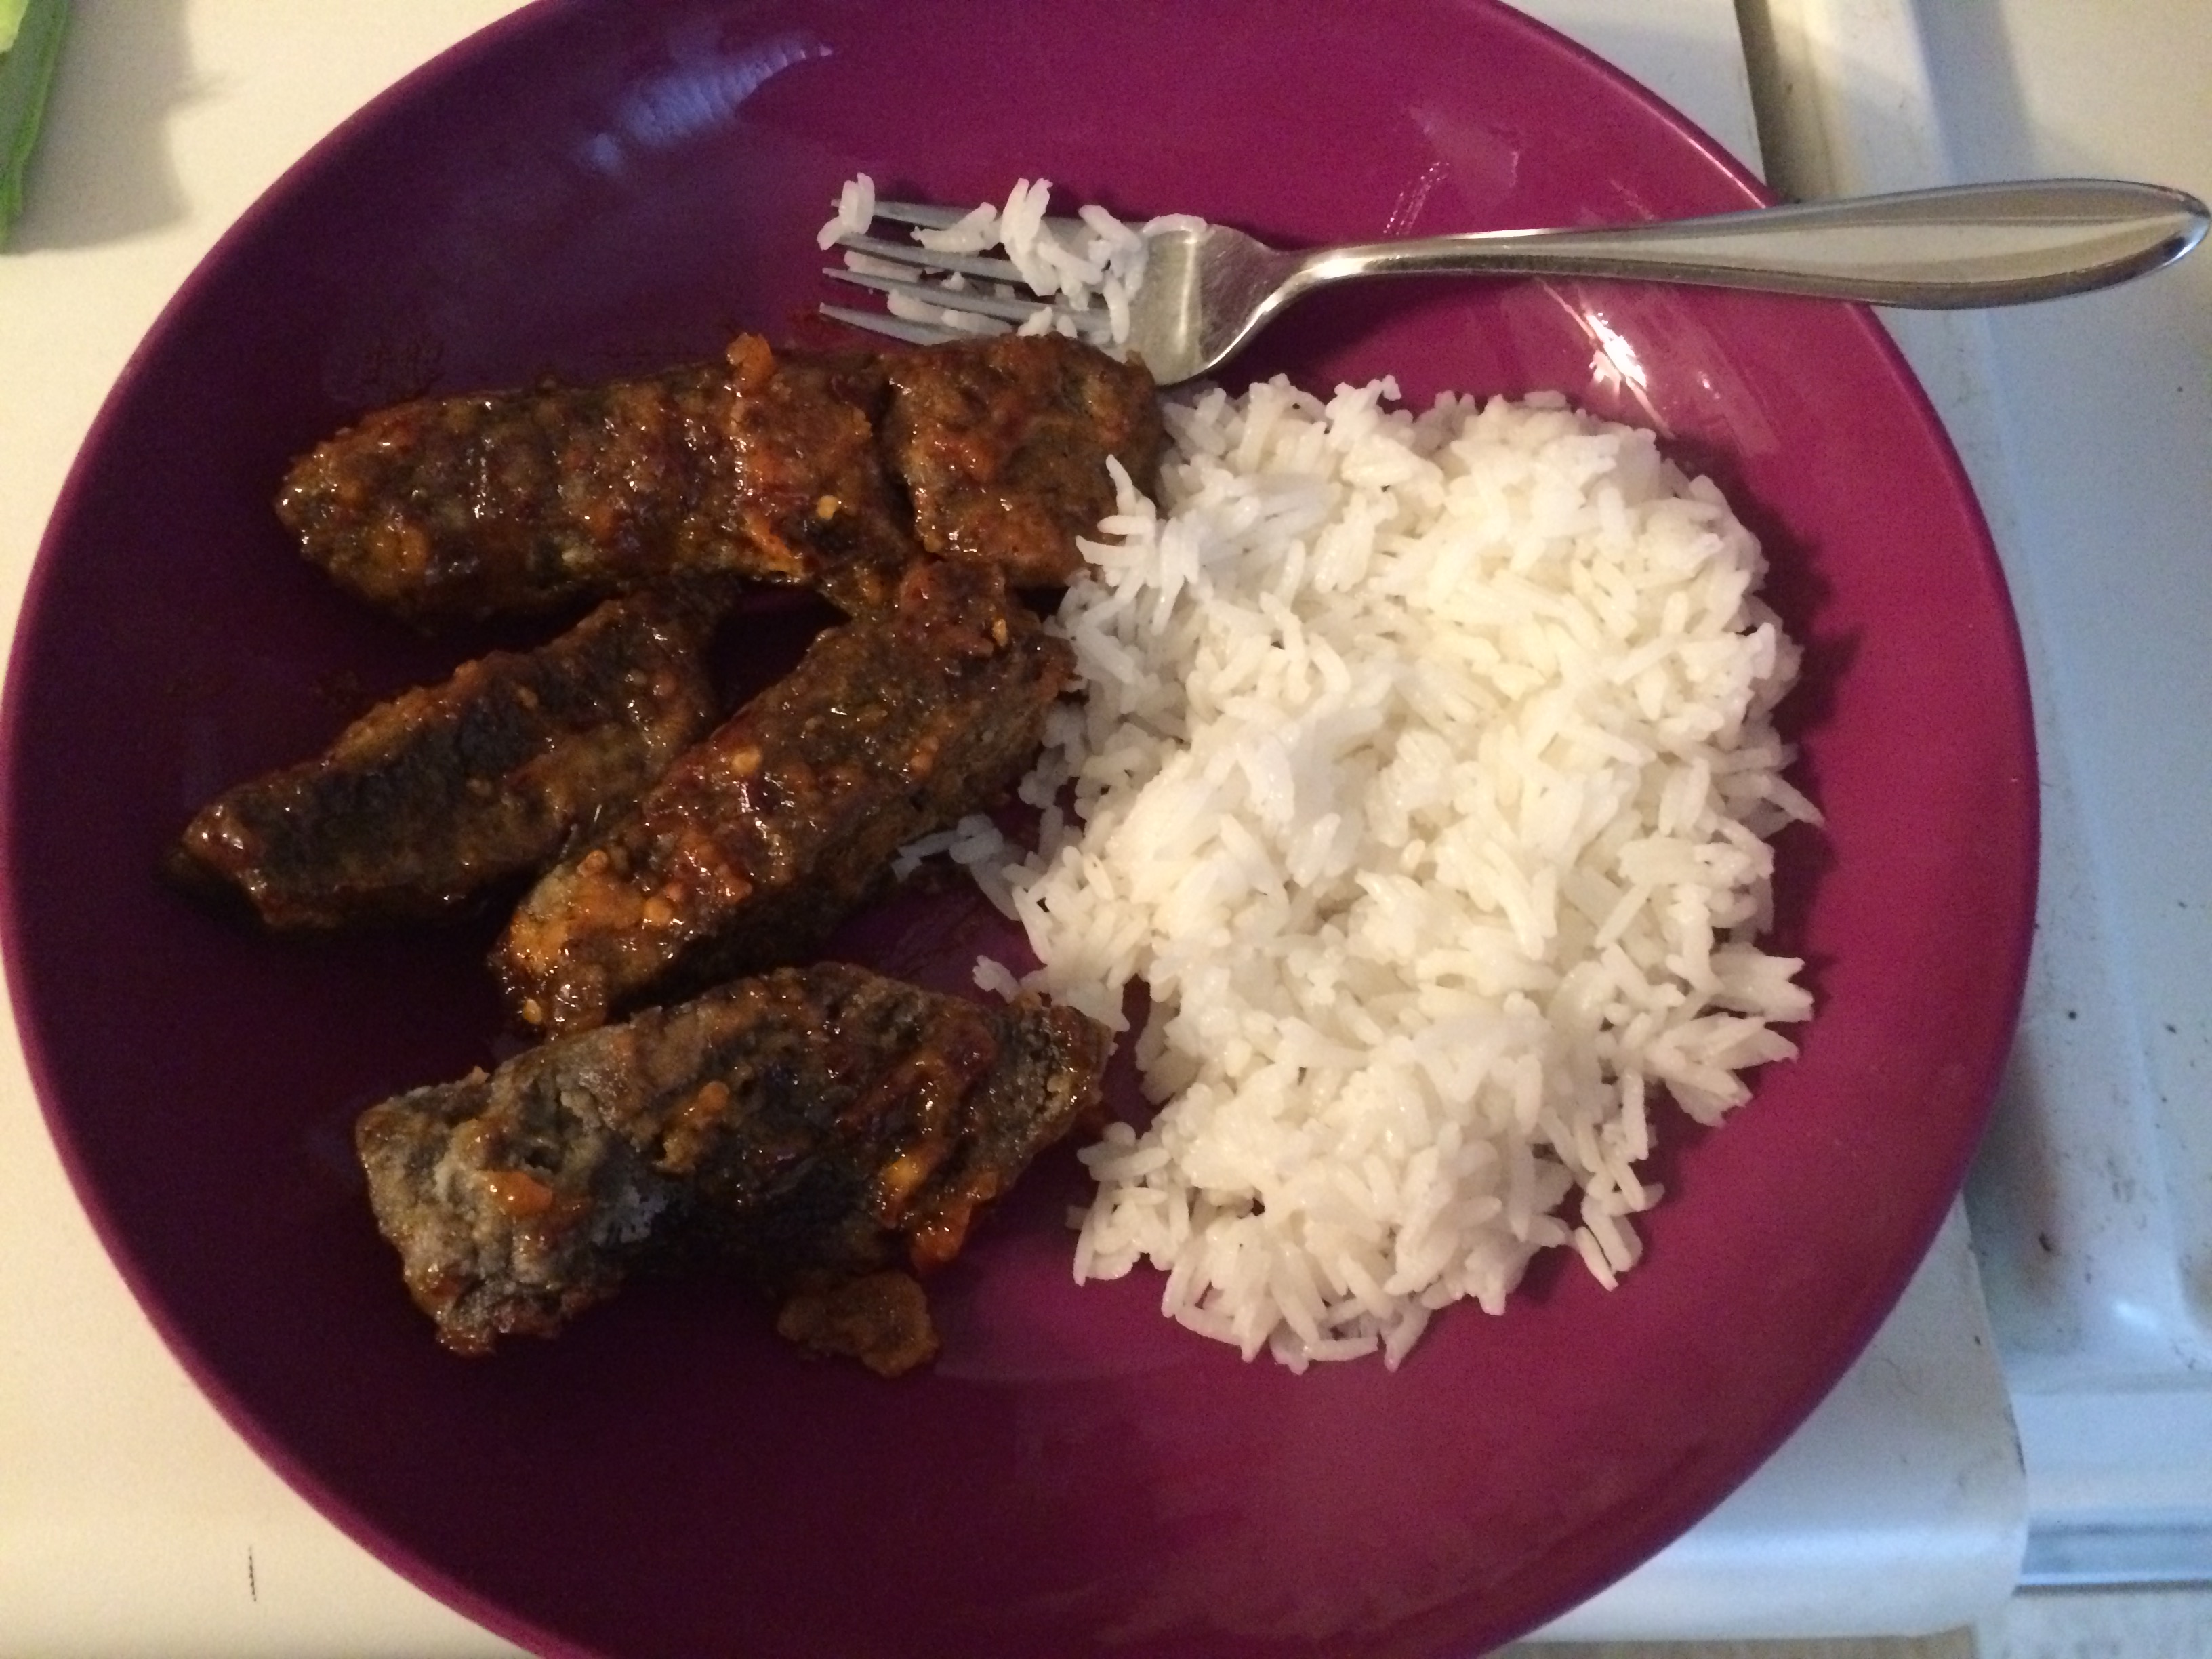
As you may have guessed from the title, I accidentally made beef riblets instead of pork riblets. This is because when I was writing my ingredients list I just wrote, spare ribs, about 3 pounds. I mean cows are the only animals we eat with ribs to spare right?

I don’t actually believe that. I’m not that ignorant.

Despite this, the recipe still turned out well, but I’m sure it’s even better with pork. Being that this is a recipe from the Portlandia cookbook, though, it’s nice to have something comedic to say. I guess. I don’t know. Can I go back to the matrix now?

Here’s what you need

  • 2 medium racks (about 3 pounds) of PORK spareribs, cut lengthwise in half
  • 6 smashed large garlic cloves
  • 1 quartered onion
  • 1 halved serrano or jalapeno chili
  • 4 lightly smashed lemongrass stalks
  • 8 1/4 inch slices of fresh, peeled ginger
  • 2 cups of low-sodium chicken broth
  • 1/2 cup of soy sauce
  • 1/2 cup of cornstarch
  • 1/2 cup of all-purpose flour
  • Vegetable oil
  • 1/4 cup of orange marmalade
  • 2 tablespoons of ketchup
  • 2 tablespoons of mustard
  • 1 tablespoon of sesame oil
  • 1 tablespoon of Asian fish sauce
  • 2 tablespoons of Korean chili flakes or Aleppo
  • 2 tablespoons of kosher salt

The first step is to make the ribs by preheating the oven to 350. You then place your ribs in a large dutch oven with garlic, onion, chili, lemongrass, ginger, broth, soy sauce, and 4 cups of water. If you don’t have a dutch oven by the way, you can use a large pot, as long as it’s oven safe that is. Whatever cooking tool you use, you’re going to bring the contents in it to a boil.

Once it’s at a boil, cover the pot and place it in the oven for 2 hours. Every once in a while check up on the ribs by turning them over too.

Now here’s where the directions in the cookbook confused me, because after the two hours are up it says to place the riblets aside on a platter and refrigerate for at least 4 hours. That seems straightforward enough but I was a bit confused as to whether I was supposed to drain the liquid or not. It states to drain the liquid after noting the fridge part, but it confused me as to why I would need to transfer the meat if that step was listed later. So I ended up keeping everything together and letting my meat set for four hours. It didn’t seem to ruin anything, so I think I made the right choice.

Unfortunately, when I did strain the liquid after refrigerating, I also threw out the drain. Don’t do this because you’ll need it later for the glaze.

Anyway, after removing the meat from the liquid you’re going to prepare the meat for a little shake and bake. The cookbook says to place the  meat in a large paper bag. I did not have a large paper bag, so I used the less fun method of mixing it in a bowl. If you’re not fun or cool like me you can do that as well. If you use the paper bag method, you will need to get a bowl and mix the cornstarch and flour together and then pour the mix into the bag for shaking. Otherwise just add the meat to the bowl. It does the same thing, it’s just not as fun.

The next step is to prepare your spareribs for frying. To do so, heat about 2 inches of oil in a pan for a degree of 375. Once you’ve reach that level of intensity, you will fry the meat until they are brown and crispy. This should take about 6 minutes.

Once fried, remove the meat from the oil and drain the excess oil off with paper towels.

While this is happening, you can make your glaze by combining the marmalade, the leftover cooking broth, ketchup, mustard, sesame oil, and fish sauce in a food processor. If you accidentally threw the cooking broth down the drain, you can do what I did and add 1/4 of a cup of water. It won’t add as much to the flavor, but it helps with the mixing.

When everything is properly mixed, you add the mix to a saucepan to simmer for about 5 minutes. You want it to simmer under medium heat and it should look glossy when it’s ready.

Once it’s ready, you then take 2/3 of the sauce and mix it with the ribs by tossing in a large bowl. Once that’s complete, arrange your meat on a platter of your choice and sprinkle it with the chili flakes and salt.

The remaining sauce can be used for extra dipping or you can just ignore that like I did and glaze the crap out of it because you know you’re going to pour the extra on there anyway so why not do it sooner rather than later.

My final result, despite it being beef instead of pork was scrumptious. In the Portlandia cookbook this is supposed to consumed as an appetizer, but I made some rice and ate it as an entree. It ended up being a nice, full-filling meal and I do recommend trying it out!

IMG_1681

55341694

Tortilla Española

This recipe comes from Portlandia, which is proving to be a marvelous little cookbook. Portlandia is the only cookbook I own based on a show, but I did cook from a Sopranos cookbook with a past boyfriend of mine. We were both big fans of the show and only a quarter Italian. We hoped that somehow we could become more Italian American if we received consultation from a Sopranos cookbook. We ended up cooking several recipes from it and all were quite good. We did not become more Italian, however. He’s married with a kid and lives in Minnesota now. I dare say he became less Italian over the years.

Oh my god……I WON! Take that! Who cares if I’m single and unable to fully support myself!? I’m more Italian now!

Who need responsibility, kids, and cold climates anyway?

If by some strange miracle that ex reads this, I’m being my usual goofy self, so please don’t take offense. I’m happy that you are happy. Also, being that you are a writer, please don’t be too cruel about my lack of writing skills.

Let us move on.

As I’ve mentioned several times, I’m just a white girl from a small town in Indiana. I’m getting more Italian and gentrified in general, but I had never heard of Tortilla Española. I looked it up before writing this entry and discovered that it’s the Spanish version of an omelette. I say it’s more like a quiche than an omelette, though.

Also,according to my research, tortilla’s origin meaning is small cake. I found that quite interesting and it made me feel better about when I first moved to California. I used to call tortillas, tortilla shells. My California friends would look at me funny  every time and say, “It’s just a tortilla, you don’t need to add an extra word in there.”

If I had known what I know now, I could have quipped back. “It is not a small cake! Ok?! It’s a shell, a tortilla shell!”

Anyway, the authentic version of this dish consists of potatoes and frying oil, but our Portlandia version is mostly scallions and chorizo. This is fine with me, though. I love chorizo. It is a meat I was missing out on until I moved here. 20 some years without the knowledge of chorizo is a sad thing to admit.

So to make this, you’ll need 12 large eggs, 1 5 ounce bag of flavored chips, 2 tablespoons of olive oil, 3 large scallions, and 3 ounces of chorizo.

Guess what the first step is?! Pre-heat the broiler! Don’t you love it when the first step is so simple?

The next step is monkey easy as well. All you do is beat all of your eggs, lightly crush your chips, and soak for ten minutes. By the way, feel free to pick whatever flavor you want. I went with jalapeno myself. Lay’s has a biscuits and gravy flavor at the moment if you want to live dangerously. Maybe that’s what they are good for, because they certainly aren’t tasty on their own.

While the chips soak, get a large skillet out and pre-heat with your oil. Once heated up, add the scallions and chorizo. I should mention that I always buy the “crumbled” version of chorizo, but if you decide to get a link, you will want to finely chop it before cooking. I recommend getting the version I buy. I mean it’s already finely chopped and it’s delicious. Why make things harder for yourself?

You will cook the chorizo and scallions for about three minutes over high heat too. Basically you are just waiting for all the fat to sizzle out in this step. Once it’s sizzled away, add your egg mix to the skillet and mix away. Reduce the heat to medium and cook for about three minutes again. This time, you are wanting the egg to settle on the side of the pan.

Once it has settled, you place the skillet in the oven and cook for 3-4 minutes or until the tortilla is lightly browned.

After that, you should have a lovely small cake of egg and chorizo! Mine turned out really well! I was extremely pleased with this recipe. It was simple, effortless, and delicious! I will certainly make this again and highly recommend it.

IMG_1363

Spanish egg cake

IMG_1365

It’s not the most classy food picture, but trust me it’s good.

Real Gouda Cheese Filled Dates

I actually let go of my OCD nature when I made these dates. My classmates decided to have an Easter party and I didn’t want to make stuffed peppers for two, nor soup. So I let myself skip to this appetizer from Portlandia.

I also realize Easter was awhile ago. Although I was able to skip to making the recipe, I had to stick to the order of when I wrote about making it. I know I have issues. Knowing is half the battle they say. I say it’s more like a quarter though.

A funny thing happened on my way to making these dates though. My classmates are actors, cause it’s an acting class. So you can imagine we have some pun and hammy lovers in the mix. We know that I’m an offender of such myself.

So I wrote I was going to bring cheese stuffed dates on our facebook invite and someone replied with, “I went on cheese stuffed date once. It was pretty gouda, but after awhile she turned out to be a real Muenster.”

He kept going with the puns. It was kind of impressive, but we didn’t let him know that. We naturally begged him to stop and I apologized to the whole group for inspiring our friend’s ode to cheese puns.

So to make a date full of puns you will need 24 Medjool dates. Side note, are there other types of dates? Do they specify Medjool so that people like my friend won’t make puns? What’s up with that? Well I looked it up just now and there does seem to be different types. I have only gone on Medjool dates though.

I not so secretly do love puns everyone. I can’t help it. I’m a sad individual I know. This was not a real gouda one either.

So you’ve got your dates. What else do you need? You need cheese and ham. Cause this date is like my friend, hammy and cheesy. Specifically though, you will need a 1/4 cup of finely chopped ham, 1/2 cup of shredded Manchego cheese and 24 almonds to smooth things over.

The first step to making your dates is to pre-heat the oven to 350. Slash each date in the middle and remove the seeds inside. Once the seeds are removed you will fill the dates with the ham, cheese, and almonds.

After the stuffing process you bake the dates for about 10 minutes or until the cheese is melted.

The end result is tasty. Dates have a sweet flavor that is hard for me to describe. It’s sort of like a raisin, only not as tart. So the combination of the sweetness of the date and the slightly bitter flavor from the cheese and ham causes you to feel like you are eating a strange and complex dessert. Yet it’s not a desert. Like I said I have hard time describing it, but you’ll be happy to know that it is truly real gouda.

I mean it’s not made with gouda, but yeah puns and stuff.

IMG_1092

Manchego and Medjool dates

Shrimp and Pork Belly, a Portlandia Pairing

My next dish comes from the Portlandia cookbook. It’s official name is Sautéed Shrimp with Piquillos, Olives, and Pork Belly. It’s another easy recipe that one can also get creative with. The book suggests to eat it with a side of crusty bread. I had it that way and for my leftovers with rice, but I could see this making an interesting filling for tacos or burritos as well.

My only gripe about this dish was that I couldn’t find piquillos. I probably could have found them at a Mexican market, but sometimes I just want to be able to get everything I need in one store. I’ve sadly contributed to the decline of mom and pop stores it seems. That’s why specialty mom and pop stores are the way to go.

To solve my laziness problem, I looked up piquillo substitutes on my phone and was told red bell pepper would work. The red bell peppers did work, but if I had to do it over again I would have picked jalapenos instead. This is because I love spicy peppers though, so if you like things mild, the red bell peppers are fine.

The first step in the cookbook is to boil the pork belly. I bought my pork belly from Trader Joe’s and it appeared to me that boiling the pork belly was not necessary so I skipped this step. Either way the next step is slice the pork belly into 1/4 inch pieces, place in a skillet with olive oil, and cook until crisp.

Once cooked, you remove the pork from the pan and set aside. In the same pan you add shrimp, garlic, paprika, and salt. Stir the shrimp frequently and cook until pink. Once your shrimp has turned pink you add your peppers, some sliced Spanish olives, and a bit of white wine. Cook this until the liquid is reduced to half of it’s original amount.

The final step after that is to add your pork and let that simmer for a minute or so. After that you’ve got a tasty small meal or appetizer, depending on your situation naturally.

IMG_0987

Shrimp and pork with brioche bread.