Penne with Swordfish

Dear readers, I almost felt attacked recently, but thankfully I didn’t take it personally.

You see there was a twitter post going around that caught my attention. One of my friends even posted it.

Middle school Rachel swooped in for a second in a panic with the thought “Is my friend making fun of me?”

Thankfully “mature” adult Rachel knows that this particular friend doesn’t know about her blog and if she felt that way it’d be teasing or just her constructive criticism opinion and not an attack to be mean.

There’s still a part of me, though, that wants to retort to Mr. Notcapnamerica that if you feel so strongly annoyed by this, then maybe you should have invested in cooking books or I don’t know…scroll down to the actual recipe and skip my poor attempts to be funny.

Oops I did it again and told a story before mindlessly plugging out a recipe, but I actually thank this snarky guy because I didn’t really have much to say before diving into this penne with swordfish recipe from Classic Pasta at Home. So, hang onto your butts, cause here we go.

What you’ll need

  • 1/2 cup of olive oil
  • 3 cloves of garlic minced
  • 1/8 teaspoon of red pepper flakes
  • 1 pound of Roma tomatoes, peeled, seeded, and diced
  • 2 teaspoons minced fresh oregano
  • 1/2 cup of water
  • 3/4 pound of swordfish fillets, any skin removed, cut into 1/2 inch diced “cubes”
  • 16 Kalamata olives pitted and quartered
  • 1 tablespoon of capers, rinsed and coarsely chopped if large
  • 2 tablespoons minced fresh flat-leaf parsely
  • 1 pound of dried penne

I’m a big fat liar, because I have to get one thing out before we do this.

Did you know you can buy frozen swordfish at Vons? That surprised me. I was certain I’d have to go to some fish market, but then I checked the frozen seafood aisle at my local Vons and there she blew. Well not literally, but you know what I mean.

I just assumed swordfish wasn’t popular enough for them to carry.

Now that that I got that out of my system, let’s begin with our first cooking step which is warming up our olive oil in a large saucepan over medium heat. Once heated add your garlic and red pepper and cook for about a minute or until that garlic starts to tempt you with his savory scents. The tomatoes, oregano, and water will be added in next.

Side note, for the tomatoes they should go through the boil and peel process before all of this. It’s very easy to do just put the tomatoes in a pot of water and then heat it up. Once it boils allow the tomatoes to cook for a minute then remove, rinse, and peel. Easy peasy.

Now back to our sauce, we are cooking this mixture until the tomatoes start to break down. This should take 15 minutes, but given we are in the middle of the pandemic times, breakdowns can happen at any moment. That’s a joke, at least about the tomatoes, it should really only take 15 minutes.

Once the breakdown has occurred, reduce your heat and add in the swordfish, cover, and then simmer for about 10 minutes or until the fish turns opaque.

Our next step is to mash the swordfish slices into the sauce. We are kind of going for a tuna salad texture if that helps. When you feel like you’ve gotten the right texture add in the capers, olives, and one tablespoon of parsley. Then turn off the heat.

This cookbook now recommends to cook the pasta, but I didn’t understand why. My multi-tasking, cutting corners when it makes sense self was like, Why not do it while the swordfish is cooking?

So that’s what I did, but if you want to follow the cookbook then just boil some water and cook the penne to the al dente preferred package instructions.

While the pasta cooks, the cookbook then has you reheat the sauce over low heat. Again, not sure why you wouldn’t just keep it cooking under low heat during all of this. I’m sure they have their reasons but I didn’t get it.

So do that and when the pasta is ready, drain the water and then mix everything together. Once mixed, serve and then garnish with parsley.

Overall result for me was that it was ok.

I love sushi and earlier tonight I had salmon that was delicious, but sometimes a fish just tastes overly fishy, like it was in nasty water. I don’t want to be simple and call it a fish smell/taste, because I don’t think that’s really the issue when people make that comment. I think it’s an issue of freshness or something else.

I still liked it enough, but there were some bites I was not enjoying it as much as I hoped. The capers and olives did help balance out the fishy taste giving it a kind of tarty and salty flavor which I liked.

So all in all, I say just because Vons sells it doesn’t necessarily mean you should buy it.

Butternut Agnolotti

Greetings and salutations dear readers.

I have another pasta recipe from Classic Pasta at Home for your hungry eyes. This time it’s agnolotti with butternut squash filling topped with butter and sage.

I had never heard of agnolotti before making this and the best way I can describe it to you is that it is a semi circular version of ravioli. You could also say it’s like an un-folded version of tortellini as well.

What you’ll need

  • 1 small butternut squash
  • 1/4 cup water
  • 4 eggs
  • 1/4 cup bread crumbs
  • 1 1/3 cup grated Parmesan cheese
  • nutmeg
  • 2 1/4 all-purpose flour
  • 2 tablespoons of unsalted butter
  • 2 tablespoons of olive oil
  • 36 large fresh sage leaves

The first step is to bake your squash and to do so, pre-heat the oven to 375. While the oven is heating up, cut the squash in half lengthwise and then remove the filling. Once the seeds have been removed and discarded cut each half into 10-12 chunks. Place these chunks into a baking pan, pour the water in and then cover the pan with aluminum foil. We will then bake the squash until it is tender which will be about 40 minutes or so.

While the squash is baking, go ahead and start making your pasta by placing your flour on a clean work surface and shaping that flour into a mound. Beat three eggs and then create a well in the center of the dough. This well should be deep enough to keep the juices of the egg from seeping through which you may have guessed is where the eggs will be placed. Once those eggs are placed, carefully beat the flour into the egg until the consistency of the egg and flour is even. In other words, when the danger of egg juice spilling everywhere is no longer a threat.

Once everything is nicely mixed, knead the dough until it is no longer sticky and then cut the dough in half.

You are now ready to flatten one half of the dough with a roller. Roll the dough until it’s thin enough to go through a pasta machine roller and then roll that dough through the machine under the setting of 1 about 7-8 times.

Once that cycle is complete you can do the same to your remaining dough half as well.

Hopefully 40 minutes went by while you were making your pasta and you can go back to making the filling by removing the squash from the oven and allowing it to cool. As it cools, go ahead and mix one egg, the breadcrumbs, and 1/3 a cup of Parmesan cheese together. Check back on your squash. If it’s cooled enough, go ahead and scoop out the filling to purée in a food processor. Once it’s smoothly puréed you can add it to the cheese/egg mixture. Top this mixture off with nutmeg and salt to your liking.

Let’s check up on that pasta again. We are now ready to create or agnolotti shape. This is simple enough, just get a round cookie cutter and circle out the dough. Once you’ve got your circles, add 1/2 a teaspoon of filling in each circle and then fold. Seal the edges by rubbing a tiny bit of water. This will help it stick.

Once every agnolotti has been filled and shaped, allow it to sit for about 30 minutes.

During this time, go ahead a prepare your boiling pot by filling it with water and well boiling. As the water boils, get a sauté pan and melt your butter with the olive oil. Once the butter has melted, lower the heat to low and add the sage leaves. Cook until they become crisp, which is about 7-8 minutes. Remove the sage and allow it to drain on some paper towels.

Keep the oil butter in your pan though, we will be mixing that with the pasta later.

Hopefully by now the water is boiling and if so, go ahead and add the pasta in. Be sure to stir it in gently.

This process should take only two minutes and once those two minutes are up, again carefully remove the pasta from the water. The cookbook recommends using a large sieve. I do not have one, so I just very carefully poured the water out into a colander.

Once the water is drained, add your pasta to a large serving bowl and then pour in that butter oil along with some salt and pepper. Coat by gently tossing and then add 1/2 cup of Parmesan and the sage for some more tossing.

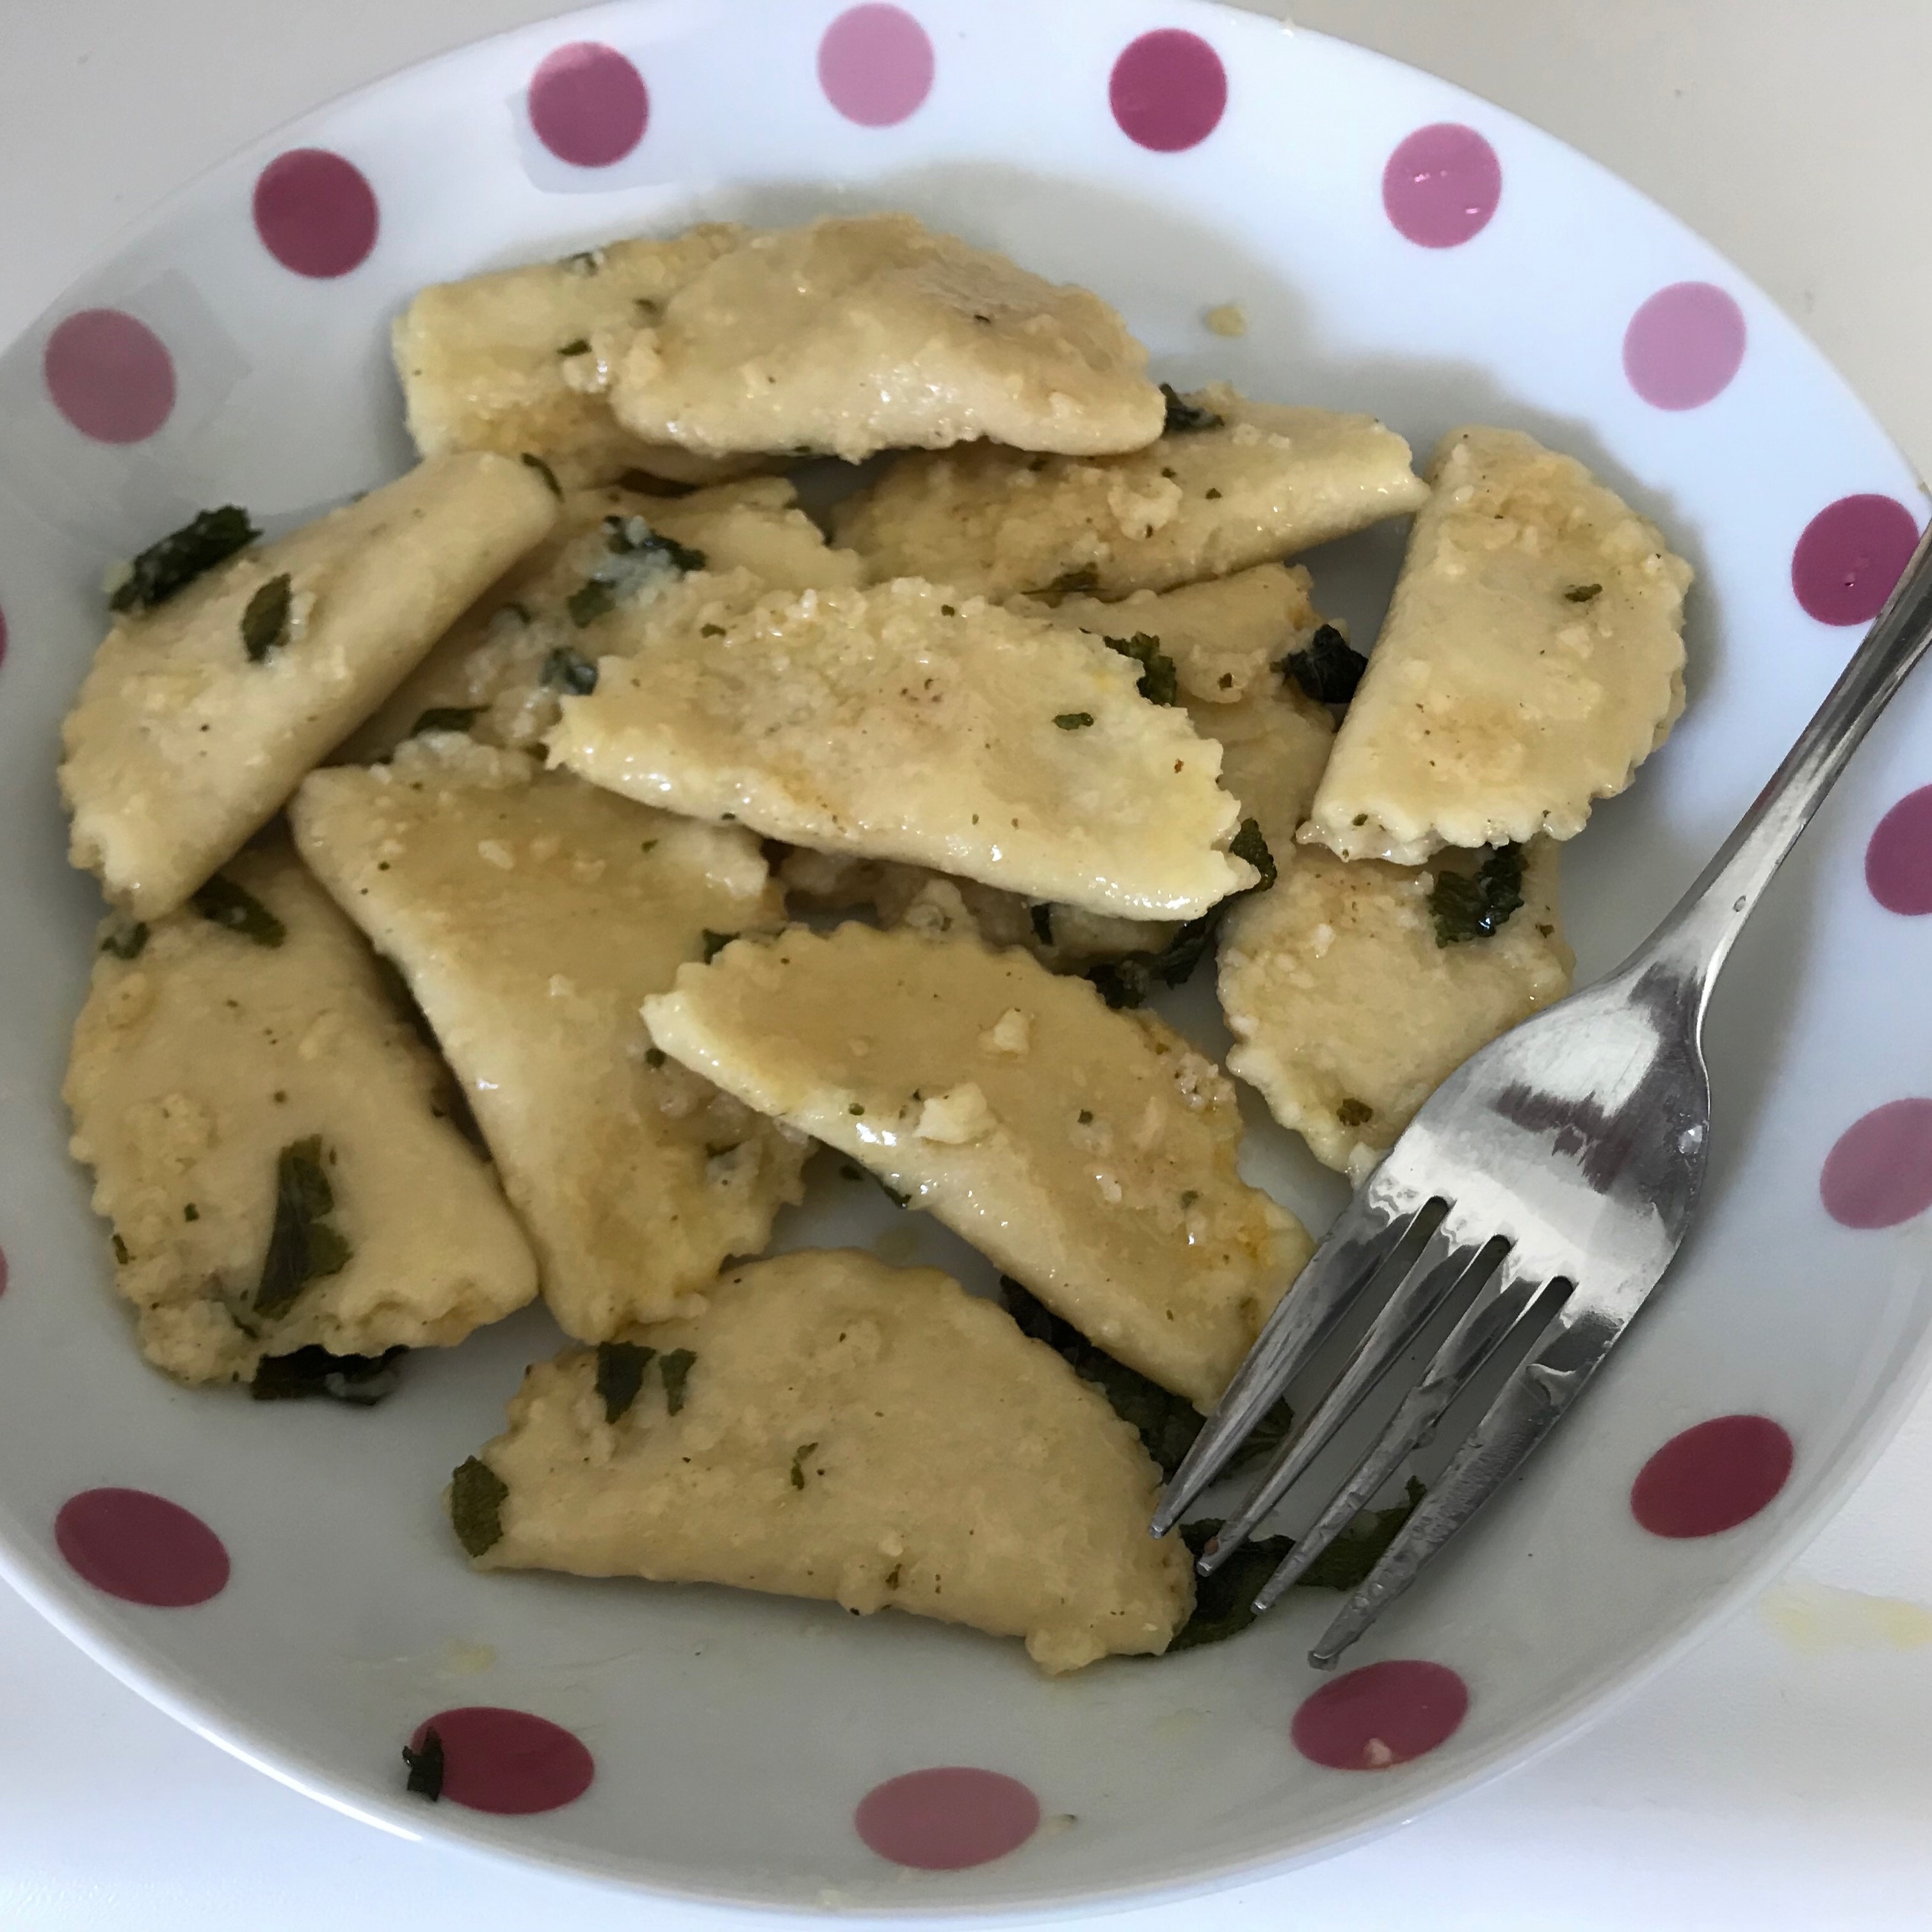
You should know have warm buttery pasta to consume like below.

EAB4257E-B5EC-4FCC-8FC0-4F1637B155E5

I was proud of myself with this recipe. As some of you know, I’ve had some mis-haps with making my own pasta, but I believe I’m getting better at.

Don’t get me wrong, it’s still a lot of work for me, but I have high hopes that I’m getting closer to having this process become smoother and more streamlined.

As far as the taste of this particular pasta, never underestimate the power of sage and butter my friends. It’s quite the dynamic duo. The sage has an intense earthy flavor with a touch of bitterness and the butter just makes the bitterness melt like putty. It’s like cream with a kick.

The butternut squash filling is so good that I ended up eating my leftover filling as a side dish for lunch. It looked like baby food but it tasted like dessert my friends.

Combine these elements together and you get quite the meal. So go ahead and try it out, it will not be one of many regrets in your life. I promise.


Penne with Angry Sauce

According to Classic Pasta at Home red pepper flakes make pasta sauce angry.

Look Williams – Sonoma, I’m here to tell you the sauce isn’t angry, it’s just talking! And boy does this Penne with Spicy Tomato Sauce love to talk!

What you’ll need

  • 1/4 cup of olive oil
  • 4 cloves of garlic minced
  • 1/4-1/2 teaspoon of red pepper flakes aka angry flakes
  • 2 tablespoons of minced fresh flat-leaf parsley
  • 1 1/2 pound of ripe Roma tomatoes, peeled, seeded, and chopped
  • salt
  • 1 lb of penne
  • 1/2 cup of grated pecorino cheese

Your first step is to heat some olive oil over medium heat in a nice large saute pan. Then add the garlic and red pepper flakes. The actual cookbook has a see note asterisk for this. This said note is basically letting you know that if you don’t use the full 1/2 teaspoon of flakes then you won’t be like a Roman.

My reaction to this note is represented below,

giphy

I guess Ron and I are just “angry”

A 1/2 teaspoon is not that much sissies! I’d put at least a whole tablespoon.

Ok, I know. I’m being a spice snot. I will get over my spice elitism and advise you to adjust to whatever level you desire. Afterall, I did a ramen spice challenge this past weekend and none of my friends could handle it. One even asked me if I had magical powers.

If that is a power, well you can enlist me in The Mystery Men.

Seriously can someone do that for me?

Once you’ve determined your spice level, saute for about a minute and then add the parsley. Stir that for a few seconds and then add the tomatoes. Kick the burner heat up to medium-high to allow the tomatoes to simmer until they break down. Stir occasionally as you wait for this to happen. In about 15 minutes they should break down into more of a sauce consistency. Feel free to add water to thin out the sauce if necessary and salt to taste as well. Once you feel satisfied with the sauce texture, reduce the heat to low.

We are now ready to cook our pasta. Do so the usual way with boiled water and such. Follow your pasta box instructions for cooking time and when it’s time to drain the water, keep about a 1/4 of a cup for later use.

Combine the pasta and sauce together and toss to allow sauce to cover evenly. Then add the cheese and do the same, adding the reserved water as you toss.

Once the cheese and reserved water has been mixed evenly you are now ready to serve!

Do so by placing each serving in a pasta bowl and then topping with some cheese and parsley like below.

fullsizeoutput_19f

Angry pasta with crostini

I was quite satisfied with the results of my angry pasta. It was simple, fresh, and “angry.”

Normally I love thinner and longer pastas like linguine, but the chunky tomatoes added to the texture of the penne making it juicy with just the right amount of chewiness. Also, there’s something about how the parsley and cheese fall into the grooves of the penne that make it bellisimo.

If you enjoy a little kick to your meals and want an easy, light pasta meal then this angry little pasta is your man!

Noodle Nuggets with Cheese Sauce

Have you ever had a noodle nugget? Well, I have and it’s all thanks to laziness.

So how do you create a noodle nugget? First step is to try to make your own pasta with a recipe from Classic Pasta at Home after your 9-5 job by yourself, get tired, and end up with pasta that’s 10 times thicker than water. Then you bring leftovers for your friends to enjoy who don them noodle nuggets.

Let me quickly add that my friends actually liked the noodle nuggets, but we all like to tease and have quirky senses of humor, thus noodle nuggets were born.

What you’ll need for noodle nuggets

  • 2 1/4 cups of un-bleached all-purpose flour
  • 3 eggs, lightly beaten

What you’ll need for noodle nugget cheese sauce

  • 1 cup of heavy cream
  • 1 cup of chicken broth
  • 3 ounces of fontina cheese, grated
  • 2 ounces of Gorgonzola cheese
  • 1/2 cup of grated Parmesan cheese
  • 1/2 teaspoon of pepper
  • 2 tablespoons of parsley

Our first step will be to make the noodle nuggets. By the way, feel free to not make noodle nuggets and buy fettuccine instead. You’ll be missing out though.

Place flour in a mound on a flat clean surface. Make a well in the center and add the beaten eggs. Using a fork, gradually mix the sides of the wall into the egg. Do this carefully so your wall doesn’t breach.

Continue this process until you can safely mix all the flour in and the dough is no longer wet.

You are no ready to knead the dough. Prepare your hands by dusting flour on them and then press your knuckles into the dough in a semi-circular motion until the dough is no longer sticky.

Divide the dough in half and roll out your divided half until smooth and flat. If you have a pasta machine, make it flat enough so it can go through the machine at the widest setting. Fold into thirds to make a rectangle and then flatten the dough again. Pass the dough into the machine again and repeat 9 times. Fold the dough into thirds after each pass through as well.

Set the machine to it’s second widest setting and pass the dough through. Continue this process but with each pass change the setting one notch lower.

Repeat this process with your other half and then cut the dough into strips. This will give you fettucine.

If you want noodle nuggets, do this same process until you’re like, “Eh, that’s good enough, I’m getting tired.”

Whichever pasta you choose to make, you’re now ready to boil water to cook the pasta. Do that. If you don’t know how to do that, just put water in a pot and then heat it until the water boils.

While that’s happening, combine cream and broth in a large skillet. Let it simmer over medium heat until it thickens. Reduce the heat to low once it’s thick and then stir in the cheeses. Let them melt and then add pepper and salt.

Allow the sauce to thin out and once it has thinned, keep it warm over low heat.

The water should be boiling at this point, which means you can cook your pasta. Allow the pasta to only cook for about a minute. Drain the water and then add the pasta to the cheese sauce. Increase the heat to medium-high and let it cook, stirring constantly until the pasta has absorbed the sauce and seems fully cooked.

The pasta should now be ready for serving and eating. Do so and touch it up a bit with some sprinkled parsley and pepper.

As I mentioned, my pasta came out very thick, but it was still tasty. The cheese sauce is rich, comforting, and flavorful. You could serve it with just about any variation of pasta, but I do think a thinner type would be best since the sauce is also thin and will easily absorb into the pasta.

I had to make new sauce for my leftovers, because the noodle nuggets absorbed practically all of the sauce. They had also congealed together, which made it difficult to get indivual pasta strands.

Making more sauce over corrected the problem so my friend added some spaghetti to it as well. The combo of spaghetti and noodle nuggets was interesting and it made the meal into a game where we felt like we won something if we got a big chunk of noodle nugget.

I highley recommed pursuing the noodle nugget, but don’t feel ashamed if you end up with fettucine or buy some pasta instead because this sauce is delicious and easy to make. There’s no reason to make it harder for yourself if you don’t feel like it.

IMG_0235

Noodle Nuggets

IMG_0236

Noodle Nuggets with sauce

Hannibal Lector’s Favorite Salad

Today we will discuss Classic Pasta at Home’s Fava Bean and Pecorino Salad. A favorite for Dr. Lector, he pairs it with his favorite Chianti and liverwurst that he gets at some special butcher shop. I can’t remember which one….I think it’s called Buffalo Bill’s Exotic Meats or something.

9608155_orig

Dr. Lector and his Chianti

Unfortunately, I ran into Dr. Lector while shopping for fava beans. His love of fava beans has no bounds. He bought them all up at the grocery store and was unwilling to share any with me. He said something about having a special dinner party and that he would invite me, but he had already “outdone” himself as it was. I don’t know what that meant, but Dr. Lector has always been a little off.

So I had to substitute with lima beans. Thankfully no other substitutes were needed.

What you’ll need:

  • 4 lbs of fava beans
  • 2 1/2 – 3 tablespoons of olive oil
  • 2 tablespoons of minced green onion, stem included
  • salt and pepper
  • lemon juice to taste
  • 8 – 12 soft lettuce leaves, preferably red. (Dr. Lector prefers the shade of Chianti)
  • 2 oz pecorinio cheese such as Toscanello or Manchego.

The first step in making this salad is to shell the fava or lima beans. To do this, you must either soak overnight or boil them for what seems like an eternity. Don’t be impatient with this step because it can make or break this salad. In other words, you don’t want the beans to be hard.

If you use the boil method, have a bowl of ice water ready. This creates a fast hot to cold effect that will rip off the skin of the bean. Buffalo Bill told me about this wonderful method by the way.

Drain the water once you let it cool down and then mix the beans in a large bowl with the olive oil and the green onions. Once these are mixed, you can add the salt, pepper, and lemon juice to your liking.

We are now ready to add the lettuce. Do so by tearing the lettuce into bite sized pieces and tossing gently along with rest of the salad.

The final step is to garnish with some cheese! My favorite part!

The cookbook recommends using a vegetable peeler and shaving the cheese into paper-thin slices. I grated mine, but I do think the shaved method would produce a greater taste of cheese. Being a cheese lover, I wished I had done this instead.

Can’t live in the past, though, right?

Anyway, you will want to toss the cheese as well. Once you have done so, it will be ready for consumption. Pair it with whatever you wish, unless it’s Hannibal Lector that is. I wouldn’t recommend that.

IMG_2061.JPG


Shrimp and Beans aka the Rich Man’s Pork and Beans

I never would have thought that shrimp and beans would be a good combo.  I like shrimp. I like beans, but together?! Get out of here!

Thankfully Classic Pasta at Home has pulled me out of the pork and bean gutter, dusted me off and taught me fancy phrases like the rain in Spain grows mainly on the plain.

giphy

In case you didn’t get it

Speaking of fancy, Classic Pasta at Home is kind of a fancy little cookbook. You’re not going to find pasta emerging from hot dog links here, which we all know is a classic American pasta dish.

I’m being sarcastic here, please don’t send me hate mail about this. It’s a joke. Lighten up Francis. Oh great, now you’re mad because I called you Francis.

102923-zombieland-popcorn-gif-imgur-j-u0ag

Moving on to serious business, I do think the actual pasta in this cookbook is classic, but the sides dishes are not what I would find in my Italian-American small town. I’ve never seen a side dish of shrimp and beans or breasola with asparagus. Both of which are incredibly delicious by the way!

So, dear readers, this is an exciting time. Get pumped up for this recipe, because un-like myself, it is a winner.

What you’ll need

  • 1 1/8 cups of dried white beans (I used canned beans, you can too. Look for 8oz worth)
  • 6 cups of water
  • 1/2 yellow onion
  • 1 fresh rosemary sprig
  • 18 large shrimp prawns, peeled
  • 1/3 cup of olive oil
  • 1/3 cup of minced red onion
  • 1/4 cup of parsley
  • 2 garlic cloves minced
  • 1 teaspoon of red wine vinegar

The first step is to rinse your beans, if you bought dried ones. If you did, you will rinse and then soak for up to 8 hours. When those hours are up, you then simmer the beans with the yellow onion and rosemary over medium heat. You will do this if you use canned beans as well. The book says to simmer in 6 cups of water. I used canned beans and was concerned about them getting soggy, so I just added a little bit of water. It was just enough to keep the beans from sticking and to allow the onion and rosemary to soak with the beans.

If you used dry beans, you will simmer for an hour. If not, I’d say 20-30. As I said earlier, I wanted to get the flavor of the rosemary and onion without causing the beans to become soggy. I ended up succeeding, but you do have to be careful to not overcook.

With both types, once the beans are cooked, you remove the onion and rosemary, drain the water, add salt and pepper, and then place it somewhere where it will keep warm.

The next step is to prepare your shrimp. I took my usual shortcut of using precooked shrimp. If you decide to be more classy and cook your own shrimp you will need to peel the shrimp and slit the back so it will open up like a butterfly while it cooks.

That’s not the only reason you need to cut them though. You also have to remove their shrimp veins. This is why I buy precooked shrimp. I could do that, but I don’t want to. Why should I force myself to do something like that when I don’t have to?

To cook the uncooked shrimp, you boil them in salted water for 45 seconds. When the seconds are up, you drain and transfer to a bowl for some tossing.

If you were not classy like I was, you should re-heat your precooked shrimp. I heated mine up in pan real quick with just a touch of olive oil but feel free to do whatever you like.

The final steps to making this classy meal is to combine the beans with the shrimp along with olive oil, red onion, parsley, garlic, and vinegar. Toss it to your little hearts content and then do a spice taste test. Adjust accordingly and then have someone who lives downstairs from you serve it to you because this is a classy dish and you are too classy to serve yourself.

In fact, just have someone downstairs cook it for you. If you happen to live on the ground floor and can’t do so. Well, I’m sorry to say that you just aren’t classy enough to eat this dish.

IMG_1765

Tumato Salad or The Salad that Stole My Heart

This salad. Oh my god this salad! I know it’s a basic thing for white girls to love salad, but I’ll have you know that I’ve always been desperately in love with chicken parmesan, pizza, burritos, and chips and salsa. It’s a toxic unhealthy orgy.

I think this Tomato and Tuna Salad from Classic Pasta at Home is the one for me though. It’s not overbearing, it’s filling, and it’s lean. I will miss my toxic orgy, but this salad will make up for it with devotion.

I’m not fooling anyone am I? I’m going to end up cheating on this salad the second pizza winks at me. The goddamn bastard knows he has me in his clutches!

Ok, so my bad humor aside, this salad truly is one of the best tuna salads I’ve had. Before I tackled this recipe, I’ve tried my hand at creating my own tuna salad recipe. It’s always good, but a meh good. It doesn’t really knock your socks and boots off. I think the key thing it was missing that I learned from this recipe is the white wine vinegar and basil. Those were the two major ingredients I was missing in my own concoction anyway.

What you’ll need to make this is, 2 large seeded and chopped tomatoes, 1/2 lb of tuna (I used Genova Yellowfin Tuna and I highly recommend it), 1/4 cup of olive oil, 1/4 cup of minced red onion, 2 teaspoons of capers, 2 cloves of minced garlic, salt, white wine vinegar to taste, around 12 basil leaves torn into small pieces, 1 heart butter lettuce, 2 hard boiled eggs quartered, and 12 black  Mediterranean olives.

To assemble the salad you will combine the tomatoes, tuna, oil, onion, capers, and garlic in a large bowl. I do not like capers and therefore omitted them, just so you know. Toss this mix and season with salt and vinegar. Toss again. Salads really like to be tossed apparently.

Once the salad is satisfied with your tossing, you will add the basil.

The final step is to divide your lettuce into 4 servings. In other words get 4 salad plates and make sure each has an equal amount of lettuce. Once that step is done, do the same with the tuna mixture as well as the olives and egg.

As you can see by my photo below, I just halved the eggs. I didn’t see the point in quartering them since I just made this salad for myself. I also bought California black olives, because I just wrote black olives on my grocery list.

Do you guys think I’ll ever get this lesson about details? I sure hope so.

I do prefer Mediterranean olives to black olives and I do think this salad would have been even better if it weren’t for my mistake. In the end, it wasn’t much of a deterrent to my enjoyment of this salad though. I look forward to making it again and this is a recipe I’ve bookmarked for the future.

IMG_1451

Run away salad! I’ll just hurt you!

Fennel Threesome with Arugula and Parmesan

My next recipe hails from Classic Pasta at Home and is an arugula salad with fennel and Parmesan. I love arugula and Parmesan. I can’t place how I feel about fennel though. I don’t hate it, but I don’t really like it either. It reminds me of people in my life who have never done anything spiteful or mean towards me, but for whatever reason I feel like something is off anyway. It’s a bizarre area of ambiguity that I am not a fan of.

Fennel is similar in that regard. I mean it’s healthy, so I feel like I should like it. It has a slight licorice taste to it, which means it’s not too bitter or sweet. I’ve liked it on certain pizzas and pastas I’ve had in the past, but I think that’s because it was just kind of there. It wasn’t really asserting itself in any way.

In this salad, Mr. Fennel was asserting himself big time and I decided I didn’t like fennel any more. He was being a little pushy. I enjoyed the arugula and Parmesan though, despite the cookbook calling arugula nutty. I always considered arugula to be just a little eccentric.

Anyway, to make your pushy arugula and fennel salad you will need 1 fennel bulb, 1/2 pound of rocket arugula, 3 tablespoons of olive oil, 1 1/2 tablespoons of lemon juice, 1 minced shallot, salt, pepper, and 2 oz of Parmesan cheese.

The first step is to slice your fennel. To do so, remove the stems and stalks. You will only be utilizing the bulb. You’ll also want to rinse the fennel. It gets a little dirty. I’m guessing from pushing itself onto everyone like the floozy fennel it is. Once you’ve rid your fennel of disease, you will cut it in half and thinly slice crosswise. When this is done, place the fennel in a large salad bowl with the arugula.

While the fennel and arugula are getting to know each other, you can make the dressing. Whisk the olive oil, lemon juice, and shallot in a small bowl to do so. If desired, you can also add salt and pepper to this. Either way, you are going to add this whisk mixture to the dance party in your large salad bowl. Toss that salad, because floozy fennel likes it and add more lemon juice if you think it’s needed as well.

Once fennel seems satisfied you can bring yourself to the party, provided you bring some shaved Parmesan with you. Fennel won’t have it any other way and arugula is just doing it’s thing.

I was not a big fan of this salad. I think mostly because I wasn’t enjoying the fennel. I also think my shallot was too big. What an unfortunate, un-intended pun by the way. I suppose I should apologize more for the other puns though. I actually came up with them.

Moving on, the shallot was a little too strong in my dressing. I think I should have used only half of the shallot I had minced. It also gave me the worst breath. I chewed a piece of gum and had three or four listerine strips before it went away.  I would have brushed my teeth, but I was in a public place after eating this. Talk about unfortunate.

IMG_1240

A slightly bitter threesome

Eggplant Rolls

This recipe comes from Classic Pasta at Home and is fairly simple to make. It’s a bit time consuming though, not so much in physical labor, but in waiting time. The eggplant cooking process is kind of like cooking with a crockpot, so to speak.

What you need for this recipe is 2 eggplants, 2 red bell peppers, 1/4 cup of fresh bread crumbs, 3/4 cup of grated pecorino cheese, one tablespoon of pine nuts, 4 tablespoons of olive oil, 2 cloves of garlic, basil leaves, white wine vinegar, and parsley.

Your first step in making this dish is to trim and cut the eggplant into 1/3 inch slices. You are only going to use 8 of these slices, however. Once you’ve got your 8 slices, arrange them on a rack and sprinkle with salt. Let them stand on the rack for about two hours. This is done so the eggplant softens, making it easy to roll up.

When the eggplant has soaked enough salt, you pat it dry and then boil it in water for 5 minutes to soften even further. After the boiling process you transfer the eggplant strips onto a towel to dry.

Now you are ready to make your filling. I got a bit annoyed with myself on this process. I almost always refer to the recipe list for my measurements, forgetting that those measurements are sometimes divided into different sections of the cooking process. Needless to say when a recipe says “throw all the stuff together!” I take it for it’s word and then just look to the ingredients list instead of paying attention to the details within the recipe.

I never said I was a good cook people. Read my intro, I admit fully I lack in culinary skill.

Anyway the first step in making the mixture I got through unscathed. That was to set the oven to the broiler setting, though. So do that and then cut your bell peppers in half. Remove the seeds and place inside the oven. Broil until the skin has blackened and then peel once they have cooled down. After they are peeled, cut the peppers finely and mix with one tablespoon of olive oil, not four like I did. You will also add pine nuts, (which I omitted because although they are delicious, they are also expensive) breadcrumbs, and 1/4 a cup of the cheese. Guess what I did with the cheese? Added too much like the oil. Thankfully my mixture turned out ok, despite this error.

The garlic is also added to your mixture, but after it’s been sautéed in olive oil for a minute. This should be done with one tablespoon of oil and the garlic should be minced before cooking.

When you finally mix everything together, all you need to do is spread the filling onto your eggplant strips, add a strip of basil, and roll up. Drizzle the eggplant with the remaining olive oil, which should be two tablespoons by the way and sprinkle with white wine vinegar.

Your rolls are now ready for baking. To do so, set the oven to 375 and bake for about an hour. Remove from the oven, sprinkle more cheese, touch it up with some parsley, and you’ve got a tasty little eggplant roll!

My rolls came out a little over cooked and stuck to the bottom of pan, but they tasted amazing! I recommend cooking them for a half hour instead to prevent this problem. I think the full hour is not needed. I haven’t tested this theory, though, so feel free to check for yourself.

IMG_1057

Overstuffed eggplant rolls

Baked Radicchio Tied with Prosciutto

This recipe comes from Classic Pasta at Home. It reminds me of pigs in a blanket only with radicchio and prosciutto instead of hot dogs and bacon. It’s not as fattening which makes it not quite as good, but it’s still tasty.

The first step is to cut a head of radicchio from the stem into 6 wedges. Once you have your wedges you are supposed to brush each wedge with olive oil. I do not have a cooking brush so I ended up dipping a bit of oil in a pan and sort of dipped each wedge.

After that step you just take a strip of prosciutto and wrap it around the radicchio, drizzle more oil, and bake for 12 minutes or so.

The final result is quite good. The prosciutto comes out nice and crisp and pairs well with the radicchio.The radicchio is a bit bitter, but the oil helps negate that. It is a little difficult to eat gracefully though. You can’t just pop into your mouth. You can cut it, but for me it was like cutting a sushi roll. It just doesn’t seem right.

Radicchio in a blanket

Radicchio in a blanket